Step by Step guide to painting a Show Car
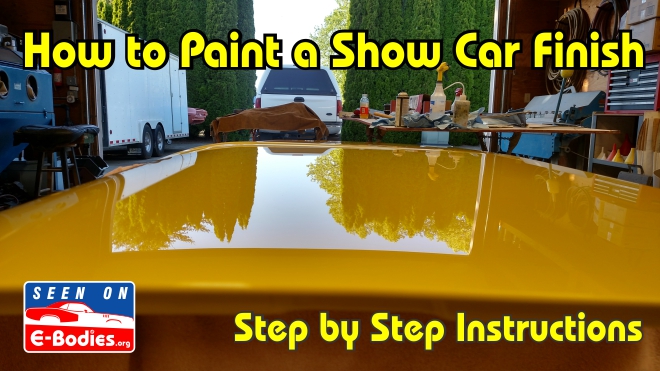
Nothing says quality restoration better than a high quality paint job. When a person looks at a car and says “WOW” out loud, 90% of the time it’s because of the paint. Regardless if you are a hobbyist or professional, if you pay meticulous attention to the details a show car paint job is not as unobtainable as you might think. I’m going to share with you the exact steps you can take to paint a show car and some tips and tricks I’ve learned on how to get the highest quality mirror-like paint job. It might be pretentious to mention a professional, but the reason for this is that a fully accomplished professional painter does not exist. A professional never stops learning. Therefore, I am grateful for any comments, tips and advice you may be able to offer me as there’s many ways to get fantastic results. Please share your knowledge by contributing to the E-Bodies.org forum.
Here are all the steps and products needed to achieve a paint job that will win shows and amaze your friends.
Step 1 = Media Blast
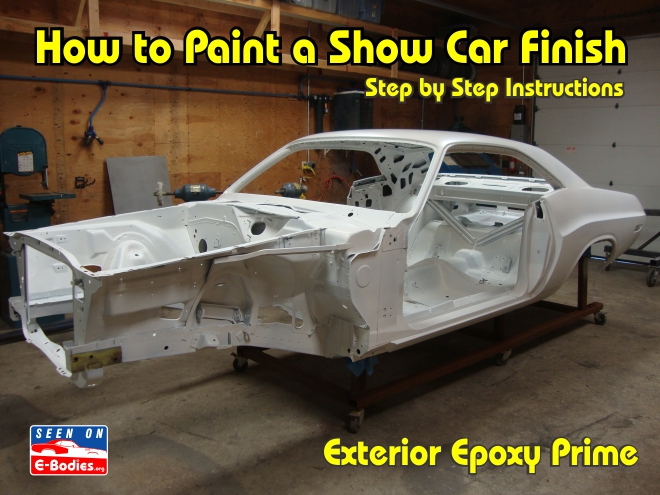
Step 2 = Interior Epoxy (2 coats)
Step 3 = Metal Prep
Step 4 = Epoxy (2 Coats)
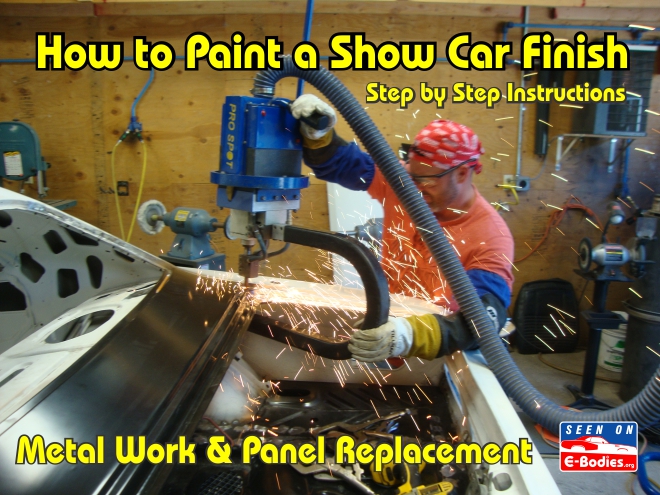
Step 5 = Metal Work (Rust repair and Panel replacement)
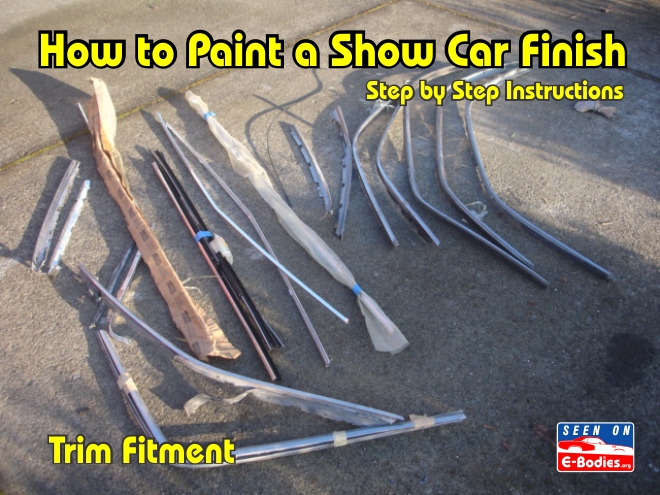
Step 6 = Trim Fitment
Step 7 = Metal Prep & Epoxy (2 coats)
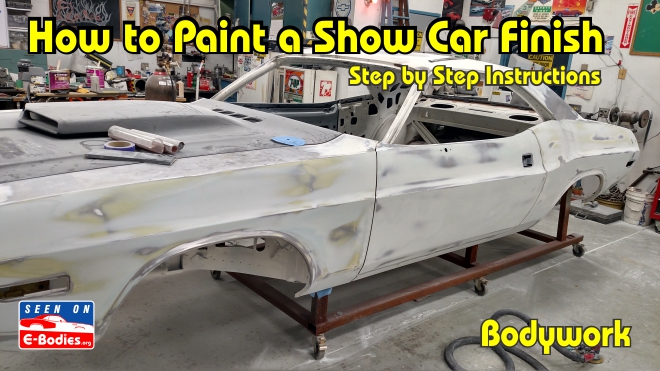
Step 8 = Bodywork (Block to 150 grit)
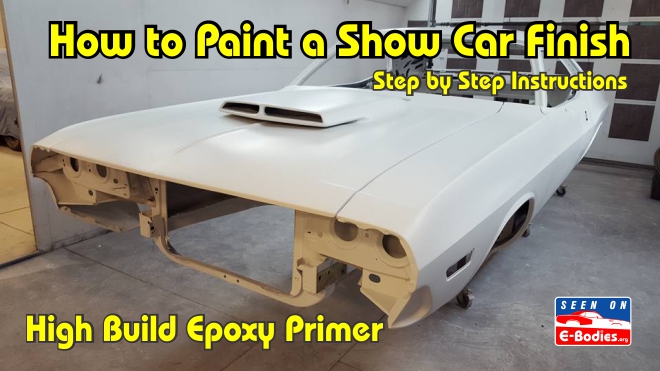
Step 9 = High Build Epoxy Primer (4 coats, Block to 400)
Step 10 = Sealer (3 coats, Block to 600)
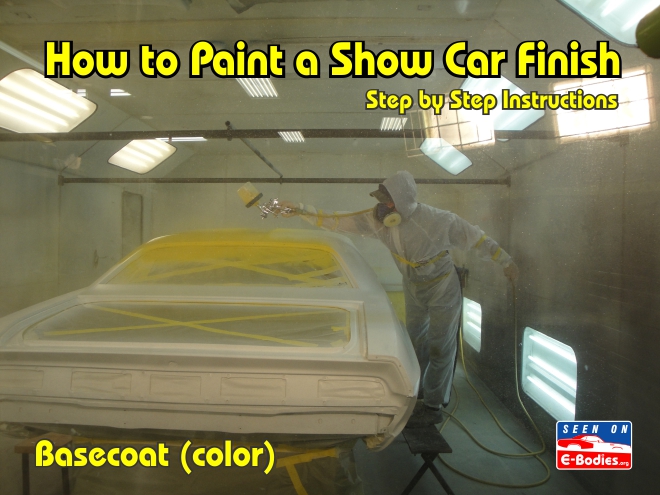
Step 11 = Basecoat (do test spray outs first)
Step 12 = Clear Coat (3 to 4 coats)
Step 13 = Block Clear Coat (Block 600 or 800)
Step 14 = Flow Coat
Step 15 = Cut & Buff (block 1000 to 5000 & buff)
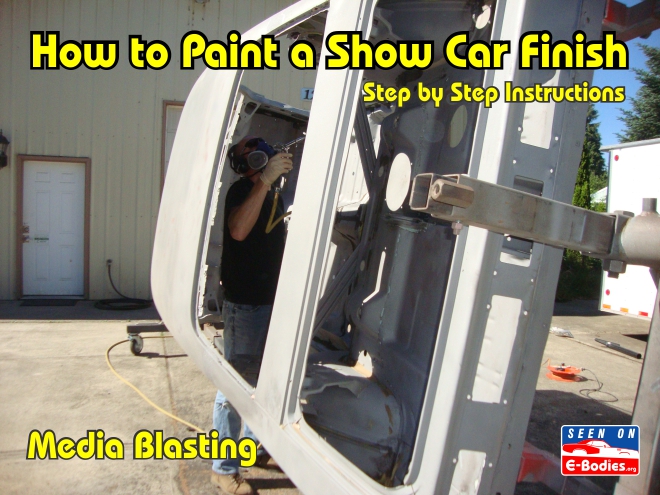
STEP #1 Media Blast = You must start with clean bare metal. Never ever trust previous bodywork no matter how good anyone tells you it is. If you are starting with a completely assembled car you need to remove everything. Bag and tag each part even if you know what it is or think you will remember later. Take photos of everything and then take more photos. You can not have enough photos. If you do not know what something is, take a photo of it installed and write the photo number on the bag or tag. That way you can always go back and look at the photos to see where it was installed. Storing items in totes is a good way to free up garage space. Use tape to make labels for the totes and write what is inside each tote. If you take something out of a tote be sure to cross it off the label. Remove all the seam sealer and undercoating too. The media blaster will not be able to remove those so you have to do it first. Everything needs to be media blasted, inside and out. Most major cities have a good reputable blaster that does a lot of vehicles and knows how to blast sheet metal. The key is to find someone that has blasted a lot of sheet metal and will be sure not to warp the metal. Warping is caused by the excessively heavy compression force of the abrasive media hitting the sheet metal surface. Overworking the area with aggressive material can cause warping. If you ask any blaster if he can blast sheet metal without wrapping it, they will all say yes. Do not take their word for it. Ask for a list of customers that have had sheet metal car bodies blasted so you can contact them and confirm it. Most restoration and hot rod shops in your area will tell you who the good media blasters are and who to avoid. Get the body, hood, doors, deck lid, fenders and valances media blasted. You might consider having them blast the K-Frame too unless you have a large blast cabinet and can do it yourself. Often times the experienced blasters will use a combination of materials depending on what they are blasting. They might use aluminum oxide for heavy duty items like K-Frames and then maybe a mix of garnet and walnut shells for the floor boards. Most will use either walnut shells or plastic media on the outside sheet metal parts so they don’t warp the thin metal. NEVER CHEMICALLY DIP A CAR BODY. When a car body is chemical dipped it removes all the seam and anti-flutter sealant between the panels that the factory put in and you will never be able to get it back in there. That makes for a finished car that can rattle, whistle, leak and give you headaches later. After the vehicle and sheet metal have been media blasted be careful NOT TO TOUCH ANY OF THE BARE METAL WITH YOUR HANDS. The natural oils on your skin will get sucked in to the porous metal and can cause paint problems later. Always use Nitrile Gloves to touch bare metal. After everything is blasted, use a high pressure air compressor and blow all the media out of the everything. If you have the vehicle on a rotisserie, spin it upside down and blow every inch of it out with compressed air. It takes a bit of time to get all the media out. Use a paint mask because it’s going to get very dusty.
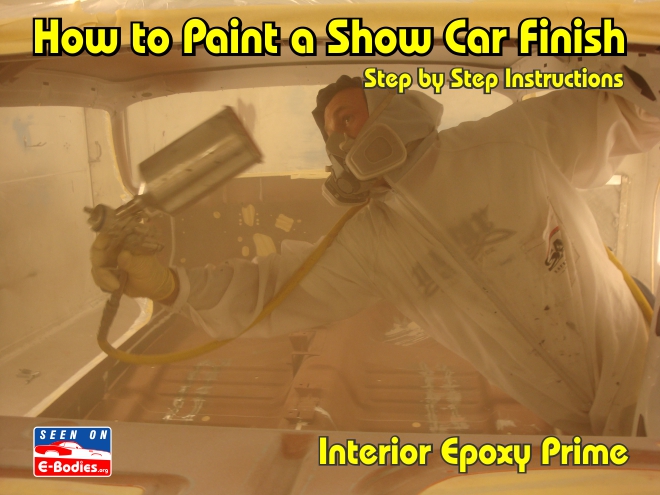
STEP 2 Interior Epoxy = Since the metal that has just been media blasted is fairly rough, you are not going to be able to wipe it down with a rag without leaving a lot of little pieces of lint. Even lint free towels will leave little pieces of lint if you try to wipe down media blasted metal. Just using air and making sure all the dust is off will work okay. You can also use 150 grit sand paper to lightly scuff the metal to make sure any blasted media that is embedded in the metal is removed. After you are sure ALL the media is blown out really well apply PPG DPLF Epoxy primer to all the interior areas only. There are different colors of DP epoxy so pick one to use throughout this process that is close to the final color of you car. I pick a similar color epoxy so if there are any rock chips later they will only show through to a primer color that is similar and that helps hide any rock chips visually. DP40 is grayish green, DP48 is white, DP50 is gray, DP60 is blue, DP74 is red oxide, and DP90 is black. I always use the DP401 as the hardener (mixed at 2:1 with 30 minute induction), I’ll explain why in step 4. The 30 minute induction time needed with the 401 hardener means you mix the hardener into the epoxy primer and stir, then let it sit for 30 minutes before you spray it. The instructions for what spray gun tip, mix ratio and air pressure for the DPLF epoxy can be found here in the PPG Spec sheet:
PPG DP Epoxy Product Spec Sheet
Spray the 2 coats of epoxy on the insides of the doors, underside of the hood, underside of the deck lid, bottom side of the car, inside the vehicle and anywhere that is not going to be exterior paint. If there are sections of metal that you know you are going to be cut out and replace due to rust, just leave them in bare metal as there is no need to waste epoxy primer. DP Epoxy mixed with 401 has a 72 hour pot life. That means after the hardener is added you have 72 hours to use it before it goes bad and you can no longer spray it. So save any extra you might have mixed up to use on the outside sheet metal in step 4. DO NOT PRIME THE OUTSIDE PANELS OF THE CAR YET. I leave the outside in bare metal until the epoxy inside the car is dry (in 70 degree weather it only takes a couple hours to dry). Then I can start preparing the outer panels for epoxy.
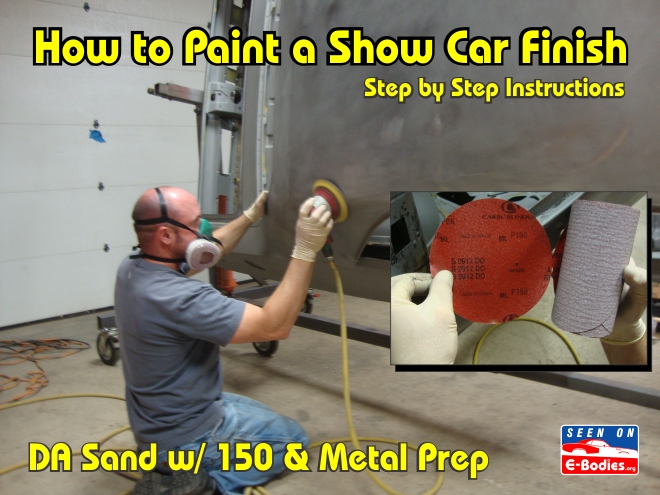
STEP 3 Metal Prep = For metal prep to work to it’s maximum potential you need to knock down the metal that is standing up from being blasted. DO NOT METAL PREP MEDIA BLASTED bare metal without first knocking it down with 150 grit sand paper. The metal prep attacks the metal at the crystalline grain boundaries and immediately the phosphate crystals begin to grow along the boundary lines. The metal prep will etch the grain surfaces. The mass of growing phosphate crystals spreads over the surfaces and grow into one another to create a barrier that greatly improves the rust protection and gives you the very best metal base to build your show car paint on. However, if you metal prep media blasted metal without first sanding with 150 sand paper the crystals will grow on top of the highest point of the blasted metal and they get so long that the barrier will become weak. Always sand (with a DA or by hand) the blasted area with 150 before using metal prep. The metal prep I use is One Choice SX579 and the spec sheet can be found here:
One Choice Metal Prep SX579 Spec Sheet
After you have sanded all the panels with 150, use a red scotch bright abrasive pad to apply One Choice SX579 metal prep (mixed at 1:2 with water) to small sections at a time. For example, you might do one door at a time or one side of the hood. Do not try to do the whole car at once. Once you have applied the metal prep, rinse it off with water. Do not let the SX579 dry on the metal, keep it wet at all times until treatment is rinsed off with water. Use water to rinse the SX579 off. We already put all the interior and underside of the panels in epoxy primer and that was done so the water in this step does not get on bare metal. I do not like water to ever come in contact with bare metal. Once the metal prep has been applied to the metal it’s fully protected and it’s okay to have water come in contact with it. After the metal prep is rinsed off with water (it’s fine to let it dry after it is rinsed off) use One Choice SX520 Metal Conditioner straight out of the bottle (no dilution). The SX520 is a second step to form a uniform layer of protective zinc. Apply it with a clean red scotch bright pad. Then rinse the SX520 metal condition off with water. Continue working in small sections until every exterior panels is metal prepped. Apply DP Epoxy the same day you metal prep.
STEP 4 Epoxy = It’s now time to put the outside sheet metal in PPG DP epoxy. For this step use the same color PPG DP epoxy as you did in step 2. If you have any left over epoxy from step 2 and it is still within the 72 hour pot life window, you can use it in this step. I always use the 401 hardener for this step because of the superior properties it has compared to the 402 hardener. It’s the only hardener that is approved over plastic parts so you know it has a strong bite while staying somewhat flexible. That’s exactly what I want because when the paint is all said and done, this first coat of epoxy is what everything is bonding to… so I need it to be super strong. Plus it has some flexible qualities that help keep rock chips to a minimum. The 401 hardener is also the only one strong enough to bite on to unsanded E-coated replacement metal. You can check to see if the panel is really E-Coat by putting a little acetone on a rag and rubbing the E-Coat. If it is true E-Coat none of the black will not come off on to the rag. Remember, the 401 hardener has a 30 minute induction time so you must mix it up and then wait 30 minutes before you spray it. The mix ratio is 2 parts epoxy to 1 part hardener. See the spec sheet in step 2. Put 2 coats of the epoxy on all the metal prepped sheet metal. At 70 degrees it normally only takes about 15 minutes to dry between coats. The window to add more coats is up to 1 week, after that you would have to scuff it because the chemical bond window has closed and it then requires a mechanical bond. So be sure to get your 2 coats done that same day or at the very least not longer then a week. Let the epoxy dry for a day.
STEP 5 Metal Work = Great job so far. The steps you have completed up to this point have created one of the strongest bases you can have for a paint job. Now it’s time to do all the rust repairs and metal work. Replace or repair all the rusty sheet metal and fix any damage to get the car back to a solid rust free and straight vehicle, just like new. I do the metal work on a jig or dolly that holds the car at specific frame rail points that are close to where the car will ride once it’s on its own suspension. There’s a lot of books written on metal work, welding and panel replacement so I will not cover specific details, but I will give you some tips and tricks for E-Bodies that will help give you the best finished show car possible. During metal work is the time to get all your gaps set. The only way to get perfect gaps is to put the car completely together with all the new gaskets and rubber seals. Yes, put the car completely back together especially before you replace a quarter panel. That means you need to install the doors, fenders, hood, and deck lid. The first thing to install is the doors, but before you hang the doors you want to rebuild your door hinges or buy new ones so you are working with the final perfect set that you will use when the car is done. When you install the doors on your new or rebuilt hinges be sure to use all the hinge bolts and hardware (and tighten them to full specs). Also install the door latch with catch pin. Since the door shells are empty I put about 52 pounds of dead weight in them to mimic the window guts and regulator that will be in them later. I use tow chains and put them along the inside bottom of the door. The door is going to sag about 3/8″ or more with the weight in there and that’s exactly what you want it to do. Double check and line the door up to the original quarter panel body lines. Put the front fenders on and the hood too. Do not skip this step. It’s good to check if the grille fitment too at this point. You have to put the hood on so you can check the gaps to the fenders. And the fender gaps need to be checked to the door. And the door gaps are set to the rear quarter panels. That’s why I do not remove the quarter panels until the doors are lined up. The doors will act as your guide if you have to replace a quarter panel. Put the deck lid on and make sure you use the torsion bars. In 1970 they used 2 torsion bars on E-Bodies, then later in 1972 they went to 1 torsion bar when the rear wings were not longer an option. After I know that everything is fitting as good as it can, I then start the metal replacement, rust repair and fine tuning gaps to perfection. Most E-Bodies need to have some rust repaired. Often it’s the window channels that rust out first so check all around the front and rear windows. The outside lower corners are the most common rust areas. The trunk pan is also something that rusted out pretty fast. They make 2 piece trunk pans that can be installed without having to remove a quarter panel. But if you have to replace a quarter panel, which is fairly common, you will want to use a 1 piece trunk pan and do the trunk pan at the same time as the quarter. Remember, if you replace a quarter panel make sure you have the door pre-hung and in place so the door can be used as a guide to get the new quarter panel back in the exact same spot as the original quarter panel. During this metal work step you most likely will be grinding and exposing bare metal so it’s best to always use gloves and not touch the bare metal. Repair and fix all rusted area now.
STEP 6 Trim Fitment = All the E-Body trim needs to be lined up and test fitted to the car before paint. This includes your drip rails, front and rear window trim, tail panel trim, front headlight buckets and any other trim that fits along a body line or opening. Now is the time to bend, adjust, bump the metal or do anything else that makes sure the trim is going to fit perfectly. The trim does not need to be fully polished yet to do this step, but it does need to be the exact trim you are going to use. Do not skip this step because if you do you will find yourself trying to line up the trim to the car after it’s painted and it’s to easy to put scratches in the paint if you do it that way.
STEP 7 Metal Prep & Epoxy= Once you are completely done with all the metal work and trim fitment the next step is to prep any bare metal that was exposed during the metal work process. If you replaced panels and they are in E-Coat, you do not have to scuff them. The DP epoxy with 401 hardener will stick right to the E-coat. E-coat was not meant or designed to be scuffed. I personally prefer to remove all the E-Coat with 150 sand paper on a DA then do my metal prep over bare metal. Also scuff all of the old epoxy on the exterior panels with a red scotch bright or 320 sand paper. Completely prime the exterior of the vehicle with 1 to 2 coats of DP epoxy giving it a solid even coat of protection for the body work to be done on top of. Wait 24 hours before starting step 8 body work.
STEP 8 Bodywork = At this point your panel gaps are perfect and the vehicle has all the body lines aligned. There is still 52 pounds of weight in the shells of the doors, the correct shims on the lower fenders, springs on the hood hinges and the trunk torsion bars are all in place. You have all the new rubber gaskets in place too. This means new door rubber and trunk gaskets. You can just tape the new trunk gasket in place with some double sided tape. The gasket and torsion bars on the deck lid will drastically change where it sits so if you do not have those in place now your finished gaps and height setting on the trunk lid will change a lot. Same goes for the doors. The door gaskets can change how the door closes, so you want all those in place too. Now I start skim coating everything to get a perfectly smooth finish. Lightly scuff the epoxy area with 180 sand paper by hand before applying body filler. Within 7 days of laying down the epoxy you can get a chemical bond, but I still do a scuff with 180 sand paper. Just make sure not to break through the epoxy. I do not put body filler over bare metal. I use Evercoat’s Rage Xtrem body filler to skim coat the car. Here’s the spec sheet:
Evercoats Rage Xtrem Body Filler Spec Sheet
I mix this on a digital scale so I know I have the exact 2% mix ratio. Then skim coat the car starting with small sections at a time. There’s a ton of how to guides and videos on how to apply body fillers and block sand so I will leave that out of this guide. But I will tell you the best way to apply body filler. After you scuff the epoxy on the vehicle and clean it really good, you mix your filler and apply a super thin coat pushing evenly and firmly. Do not apply all of it at once, instead you want to build up the coats. With the first pass you’re trying to get it so thin and tight to the metal that you can see through it. The goal is to build it up nice and slowly over the paper thin coat that was pressed firmly to the metal. This is all done in 1 single step, but with multiple passes. Temperature effects body filler drying times so plan accordingly for your environment. If it’s hot, do not plan on big doing areas. Make sure and apply filler as smooth as possible and avoid any grooves or craters. Once the body filler is dry I guide coat and block sand with 80 or 100 grit and then finish with a guide coated 150 block sand. I use tape along the body lines to get them laser straight. Remember, the body filler is not to be sculpted with and it’s not to be used to fix gaps or fix dents. It’s only to be used to smooth the metal.
STEP 9 High Build Epoxy Primer = Wipe and clean the car with wax and grease remover really well. Make sure it’s blown clean and free from any dust or contaminates. I then shoot the car with a PPG VP2050 High Build Epoxy Primer. The spec sheet is here:
PPG High Build Epoxy Primer VP2050 Spec Sheet
It mixes at a 2 to 1 ratio and has a pot life of 2 hours. Put 3 to 4 coats on the car. Be sure the each coat has completely flashed before applying the next coat. You should never use more than 4 coats because the thickness after we are done sanding can not exceed 8 mils. 4 coats should put you right around 9 to 10 mils and we’ll sand off about 2 to 6 mils. Once it’s dry, guide coat and block sand with 220, repeat with a 320 block sand and again with 400. At this point you have a surface that is perfectly flat and straight. Sometimes I will go to 600 at this step and then skip the 600 sanding step after the sealer.
STEP 10 Sealer = Make sure the car is completely clean by using wax and grease remover. A good sealer to use is the Envirobase ECS. Mix up the correct color Envirobase ECS sealer for the color you want to paint your car. Try to get as close as you can to the right shade for your final color. It’s good to do test spray outs of your final color over the exact sealer shade you want to use. That way you know the color will look correct when you are done. Most of the time I will do 5 to 20 test spray outs of the final color to dial the final paint mix to perfection before I paint the car. Make sure to keep track of how many coats you use during your test sprays out. You will see a difference between the number of coats in terms on the final shade of the color. If you are going with a brighter color like yellow or orange then light sealers (white or light grey) will give you a brighter finish. Dark colors like black, dark blue or dark green can use darker sealers. There is a mixing chart for the different color shades of sealers on the last page of the spec sheet:
Envirobase ECS Sealer Spec Sheet
Mix at 3 to 1 to 1 and you have a 1 hour pot life to spray it all. Put 3 coats of sealer over the whole car. If you sanded to 600 on the high build epoxy primer then you might only need 1 or 2 coats of sealer and you would not need to sand after. But if you only went to 400 in the previous step, then wait for the 3 coats of sealer to dry and block sand with 600 and a guide coat. This is the very last time you will be able to check and make sure the surface is perfectly flat and straight. Use a pump sprayer with wax and grease remover in it and spray the car to create a wet sheen to it. Get down and look at it from every angle to check that all the surfaces are perfectly flat and straight. This is your last chance to go back and fix anything that is not perfectly flat and straight. The wax and grease remover when applied wet will give you a little easier peek at what the car will look like painted. Before you move on to applying the base coat color be sure to put all the seam sealers on the panel joints. If you decided to sand to 600 in Step 9 then you would put the sealer on after that (before the sealer). I like to use the 3M Urethane Seam Sealer. The spec sheet is here:
3M Urethane Seam Sealer Spec Sheet
STEP 11 Basecoat = I use a SataJet 3000 RP’s with either a 1.2 or 1.3 tip. This is the stage where you need to make sure everything is perfectly clean and ready to go. If you do not have a paint booth, consider renting one or setting a temporary one up in your garage. There’s a couple different ways to paint a car. You can paint it all together or you can paint it apart in individual pieces. If you paint the car completely together you will need to “Jam” it first. That means you need to paint all the jams and underside then put it all together and paint the outside all at once. Painting it together gives you the best possible chance of having everything match in terms of shades, but you can sometime see the taped edge where the jammed parts meet with the exterior paint. If you plan to paint a metallic color you will most likely want to do it with the car all together. Metallic paints are harder to paint because changes in air pressure, distance and direction can drastically change how it looks and lays down. Single stage metallic paints (the color and clear are mixed together) are the hardest to spray without getting tiger stripes or blotching. Solid colors in both single stage and base coat / clear coat are much easier to spray for beginners. The other way is to paint the car apart in pieces. Painting the car apart in pieces ensures there will not be any tape edges, but you run the risk on the color not matching perfect. Only paint the car apart if you are using a non metallic color. And if you paint the car apart you need to be very constant on how many coats you use and the overlap of each coat on all the panels. In either situation you will want to batch your paint before you start. What “batch” means is if you have 2 spray-able gallons of color then you would mix them together in a larger can so all the color is mixed and any small variances are removed. For any color other than black I use PPG DBC Basecoats (also known as Deltron 2000). Here’s the spec sheet:
PPG DBC Basecoat Color Spec Sheet
There are 2 tips I can give you that will really help with this step.
Tip #1 = Mix your basecoat with optional DX57 (1 to 1 to 5%). Without the optional DX57 the basecoat is just a Thermoplastic, with the 5% DX57 added it becomes a Thermoset. This is important if you ever have do to a repair. Trying to repair Thermoplastic color that is under a clear coat will almost always want to ring out. A ring out is a visual line around where the thermoplastic and the Thermoset (clear coat) meet. By adding the DX57 to the basecoat you create a Thermoset which is the same as the clear coat and it makes any future repairs much easier and pretty much invisible.
Tip #2 = This tip is about preparing the surface for the basecoat. With the paint booth on, you want to blow off the area that you are going to paint with compressed air. Wipe the surface to be painted with wax and grease remover and a lint free towel. Then use a tack cloth to wipe the surface down (lightly, not pressing hard). That is pretty much all the instructions with any paint will tell you that you need to do. But I’m telling even after you do the wax and grease remover and the tack cloth you will still have micro small dust particles on the surface. Wash your hands with a high alkaline dish soap like Dawn. Wash them as good as you have ever washed them. Air dry them off and do not touch anything that might contaminate them. Go to the surface that you are going to paint. Rub your hands together (open palms) for about 10 seconds to make sure there’s not anything on them and they are dry. Then with your bare hand (open palm) softly wipe the surface off. You will be amazed how much you will feel and how much your bare hand will clean the surface to perfection. Every 15 seconds or so re-rub your hands together to keep them clean. This is the only way I’ve found to get perfectly 100% clean and dust free surfaces.
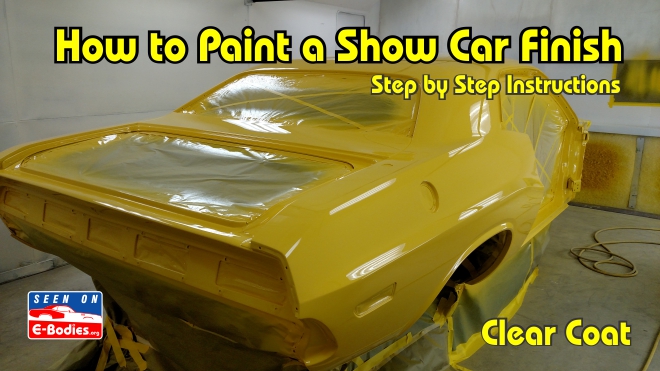
STEP 12 Clear Coat = You will want to use the very best and high solid clear coat you can afford. The two clear coats that I will suggest are the Glamour Clear 8152 or PPG 2021. They are both very high solid clear coats at 41.8% and 42.0% respectively. The only difference is the 2021 is slightly harder when it dries and 8152 is a bit easier to polish. They are both super high end clears that will work well. The 2021 is 4 parts clear to 1 part reducer to 1 part hardener. I like to use a slow reducer, for example if it’s 65 degrees out I might use DT870, if it’s 70 degrees I will move up to DT 885. And the hardener to use is DCX61. Pot life is 3 hours. The Glamour Clear is mixed at 3 parts clear to 1 part reducer to 1 part hardener. Use reducer DT885 with D8372 hardener. Pot life is 4 hours. Here’s the spec sheets:
Glamour Clear 8152 Spec Sheet
PPG 2021 Clear Spec Sheet
As soon as the base coat is dry (about 15 minutes at 70 degrees) you can apply the clear. Apply 3 to 4 coats. Make sure each coat is flashed off before proceeding. Let it dry for a couple days minimum, but preferably a week.
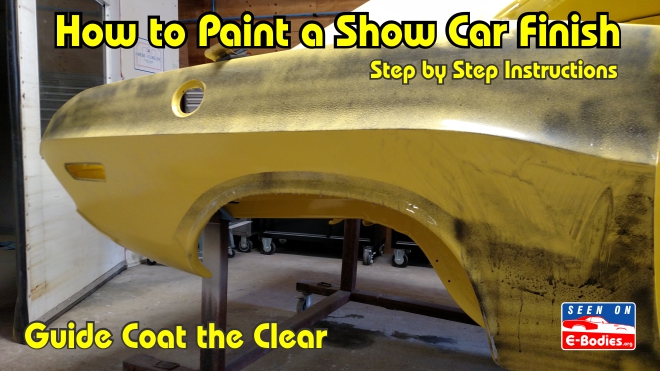
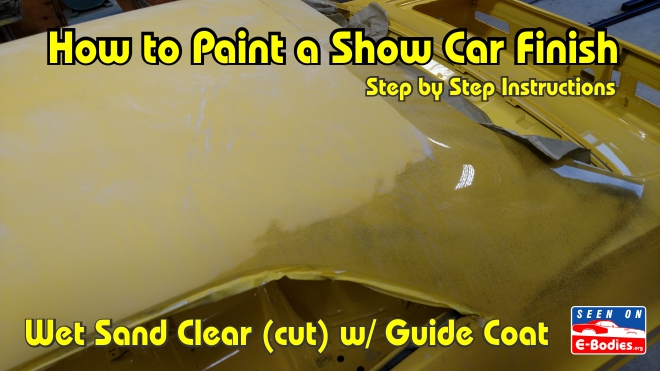
STEP 13 Block sand the clear coat = After the clear coat has dried a couple days minimum, wet sand it with a block and 600 or 800 grit sand paper while using a guide coat. 600 or 800 grit will just depend on how flat the clear laid down. If you used a small tip on the spray gun (like a 1.2) you might end up with a little flatter surface (less orange peel) and can go to the 800 grit. I like to use a 1.3 tip and it lays down a bit more product, but it will also orange peel a little more. So I normally have to sand with 600 at this stage. I use spray paint guide coat on the clear. Just make sure you have all the guide coat off before the next step. You can wipe up any excess guide coat with a little lacquer thinner on a rag. Do not let lacquer thinner stay in contact with the clear for very long. Re-clean with wax and grease remover.
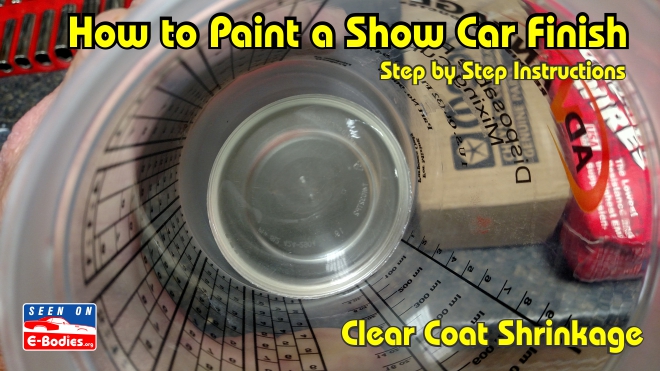
STEP 14 Flow Coat = A flow coat is a term for putting more clear over clear after it has dried. It’s a trick to get a super wet looking mile long deep gloss. Use the second tip in step 11 to get the surface perfectly clean again and ready for more clear. Add 3 to 4 more coats of clear. Again, the more clear you add the more it will orange peel, but you will also have more clear built up to work with when you are polishing. If you can use a 1.2 tip on the gun you will get a flatter result. I’ve had a lot of success with a 1.3 tip too. Another trick I do is when I’m all done with the last coat of clear I leave about 1/4″ in an old plastic mix cup and let it dry. That allows me to watch the clear shrink over the next few months and I will be able to see exactly when the car is ready to cut and buff. Do not cut and buff any sooner the 30 days.
STEP 15 Cut & Buff = After you have let clear dry for at least 30 days (and much more time if you can), it is time to cut & buff. The clear is going to shrink for months and months so if you cut and buff too soon the clear will just keep shrinking and you will lose your perfectly flat surface. So do not be in a hurry to get this started before the clear has completely dried. When the clear dries it shrinks (as seen above by the clear at the bottom of the mix cup) and that means it pulls back from the edges. That’s why you hear so many people have trouble with burning through the edges when they buff clear coats. So STAYING OFF THE EDGES can’t be emphasized enough while cutting and buffing. You do not need to cut (sand) the edges at all. You can use the guide coat method to help see where you have cut while sanding the clear and that will help you see the edges. The edges should always have guide coat on them because you never sand edges. I’ve heard of someone using a sharpie on the edges too so they can see that they have not sanded the edge. Either way, staying off the edges can not be over emphasized enough. The goal in the cut & buff stage is to start with the highest grit as you can and still get the clear perfectly flat. Do a test area with a hard block and wet 1500 grit sand paper, but most likely you will need to back down to 1000 or 800 grit to get it perfectly flat. You’ll know you have the right grit when you can remove the guide coat and the area you sanded has an even matte flat look to it. If you can see little un-sanded glossy lows points then you did not cut all the orange peel out and need to go down (more aggressive) in grit paper.
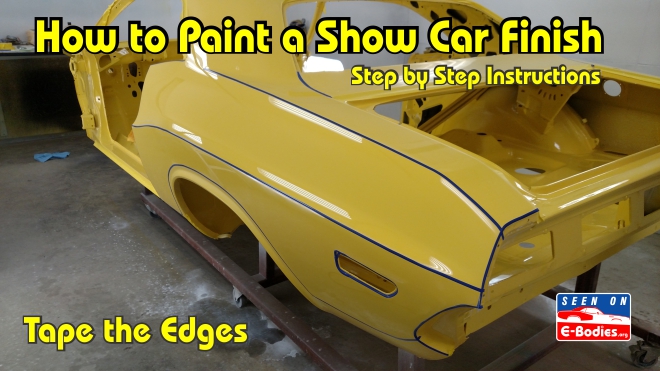
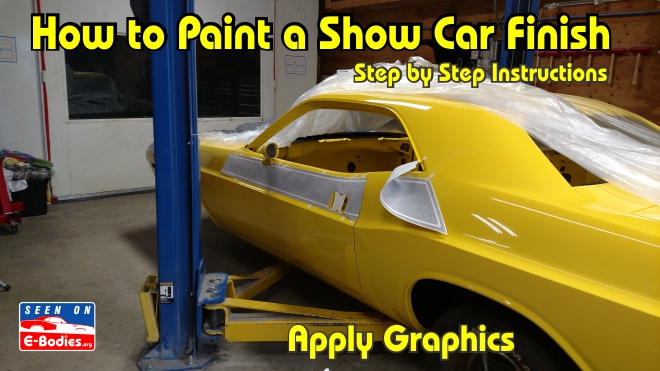
Use a hard sanding block to sand the clear with a cross pattern like you did in the body work stages. Once the guide coat is gone, stop sanding that area. When you finish the whole car with first stage of grit (800 or 1,000), re-guide coat the car and do it again with next step up in grit (most likely 1200). Then repeat with 1500 and 2000. Each time checking to make sure all the previous grit scratches have been removed. Since the guide coat can be pretty thick, I will put it on very thin when I start getting up in the 1200 and 1500 grits. At 2000 the guide coat needs to be super thin or even stop using it altogether. At 2500 grit you really need to stop using the guide coat as it will gum up the fine sand paper to much. Another helpful trick is to tape off the edges so the thin clear coat on the edges does not get touched at all. You can remove the tape when you get to the 3000 grit, but still stay off the edges. You might need to lightly buff them, but do it with the buffer (super lightly) and always have the wheel spinning OFF the edge. Never let a the leading edge of a buffer or polisher catch the edge of a panel because it can rip the clear coat off. And when pulling tape off, always pull away from the edge, never pull towards it because just like the wheel it might rip the clear up. You might be able to make the jump from the 2000 grit to 3000, but if you try and you are still seeing the 2000 grit scratches then drop back to 2500 before the 3000. Once you get to 3000 you can start to use 3M Trizact foam disc system. I do 3000 and 5000 in the Trizac system. Then it’s time to buff. I like to use the Rupes buffing system, but there are many good products for buffing. Find the one you like best and finish buffing the clear to a mile deep show gloss that will look wet like it was just sprayed. Give the freshly cut & buffed clear a month to dry before adding any graphics.
Do not apply any wax or polish for at least 30 days after you cut and buff.
Following these steps will give you the confidence that your paint will look shiny and last a long time.
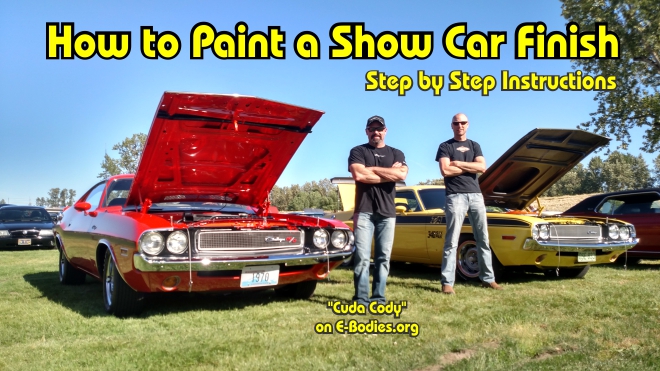
If you have any comments or questions you can find me on the E-Bodies.org forum as member “Cuda Cody”.
< Back to Buying & Restoring an E-Body
Version 1.4
